
In The Legend of Zelda: Echoes of Wisdom, you’ll need to revisit Hyrule Castle again after helping the Gerudo and Zora with their respective giant rifts.
Before this, you’ll visit Lueberry again at his workshop to get the lowdown. From there, you’ll head north on the map until you hit Hyrule Castle in the center. General Wright will try to get back inside, but not before the rift at the castle expands, swallowing most of the town.
By this time, you should have a decent arsenal of echoes from your previous dungeons. You’ll want to use these to help you quickly traverse the Stilled area ahead. Make sure to also power up your Swordfighter form using Might Crystals in Lueberry’s workshop if you haven’t already.
Below is our full Hyrule Castle walkthrough for Echoes of Wisdom, where we’ll show you how to get every chest and new echo along the way, plus where to find the dungeon map and how to beat the dungeon’s boss.
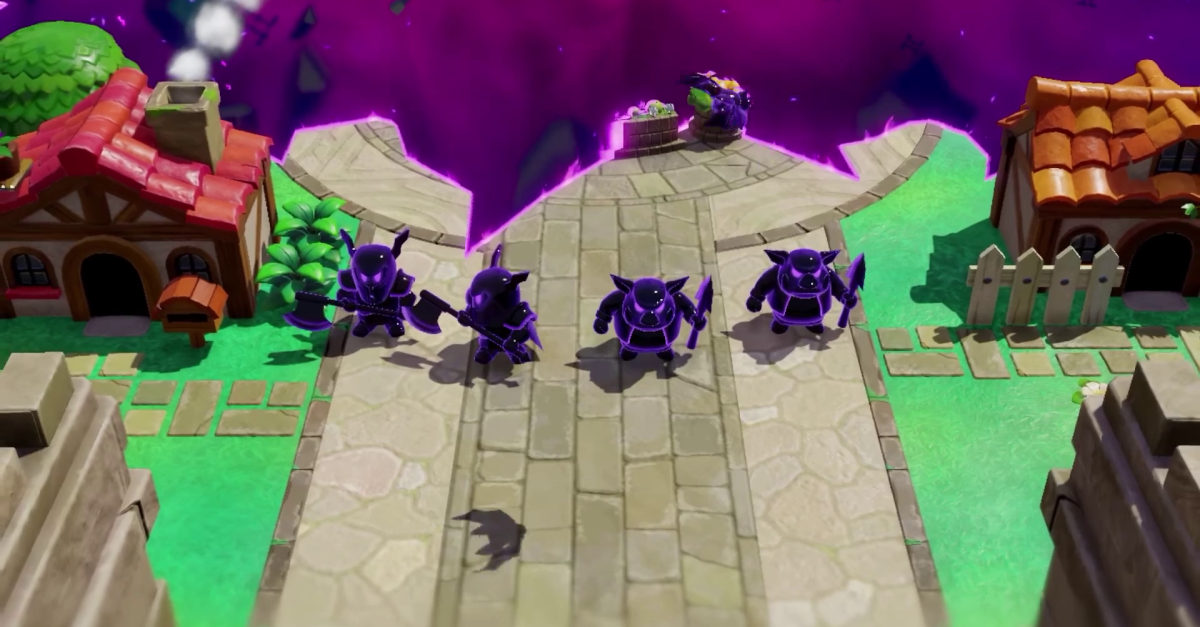
Stilled Hyrule Castle Town walkthrough
Once you’re ready, head straight inside Hyrule Castle Town and take out the shadow baddies in front of you. Go left and then up until you see the open well. Use an echo to give yourself a boost in and jump in there.
Tri will open up an entrance to the rift here for you, so dive in whenever you’re ready.
In the Stilled Hyrule Castle Town, follow the only path you can: Go up the stairs, out of the barracks, and then to the right. You’ll need to take out several bad guys along the way, which we recommend just breaking out your Swordfighter form for, as they’ll give you back Swordfighter energy after defeating them.
There are several buildings you can go into, but none of them have anything notable in them, so feel free to pass them by.
Before you continue north, crossing over a bridge that’s made out of a sideways house, scale up the wall on the right. Go north, using a flying tile to cross this large gap. Keep going north, and use water blocks to scale up this ledge to get a chest with a monster fang inside.

Image: Nintendo via Polygon
Jump down and now cross that house-bridge and keep following the path west. You’ll eventually pass a fountain (with more bad guys), so head north to find a chest with seven radiant butter inside and a warp waypoint. Use Tri to get the chest out of the ground, activate the waypoint, and scale up the wall on the left side. Again, use a flying tile to cross this gap, landing on a platform on the left and claiming a red rupee (worth 20 rupees) from a chest.
Backtrack to the butter chest and scale up the water by swimming. At the top, drop off the ledge on the right side to safely land on some trees and continue right.

Image: Nintendo via Polygon
Jump down the ledge on the right to grab another red rupee, and then make your way up the water. Carefully swim and jump from these isolated waters until you’re at the castle.
Hyrule Castle walkthrough
Once you get inside the castle, activate the warp waypoint and continue forward. Take out the knight in this room to learn the Darknut Lv. 2 Echo, a very helpful combat echo. Keep heading forward to the throne room for a short cutscene.
Use Tri to move the throne behind the frozen king to reveal an underground passageway. Continue straight down this 2D passage and activate the warp waypoint in the next room. Use Tri to pull at the handles on the wall to reveal another hidden passageway.
The next portion of the game is a stealth mission similar to your initial breakout of the Hyrule Castle Underground jail. If you’re caught, you’ll be teleported into a bizarre void jail cell where rift enemies will appear, and then back to the start of the area or to a midway checkpoint, depending on where you got caught.
Lucky for you, you should have a whole slew of tools at your fingertips to cross this area without having to really do too much stealth. Our personal favorite method was scaling up one of the shelves and leaning on the ever-trustworthy Flying Tile Echo to just skate straight over the guards. Doing this at the shown location below will drop you on to another bookshelf safely:

Image: Nintendo via Polygon
From there, you can use another flying tile, which will drop you by three crates — which is also the checkpoint. If you get caught again, don’t fret, as you’ll start here next time.
From here, you actually have to stealth a bit. Wait for the guard in front of the trees to turn around and use Tri to move the potted tree away from the ladder. Climb up the ladder move the boxes so you’re on the right part of the shelves. Use another flying tile at this location to be safely transported to the top of some crates and barrels:

Image: Nintendo via Polygon
Wait for the guard that circles the shelves you’re on to turn around (they might be confused by your tile breaking, so just wait it out), and then head right towards the potted plants. Move one out of the way so you can keep heading right and then climb up the shelves so you can sneak behind the guard.
From the right-most part of the shelf, fire a flying tile (or throw any pot, crate, etc), to grab the last guard’s attention. When he moves towards where the item exploded, head towards the door and get out of there.

Image: Nintendo via Polygon
You’re now in the jail cell room, so head up through that original hole in the wall that helped you escape the first time to see a poor frozen Impa. Read her diary if you want, and then continue on, making sure to activate the warp waypoint in this room before you head down the ladder.
Continue on and take out the knights in the room. (The darknut you picked up earlier should help take these down quickly.) Once all three are defeated, the gate on the left side will open and you can keep moving.
This room has some shadowy enemies inside that you should be able to take out quickly in Swordfighter form. Head down the ladder and first go left to pick up a chest with a monster stone. Then head down another ladder on the right (next to a pot) to get to two chests. One of them has three twisted pumpkins and the other has five floral nectar. Go down the two ladders to get to a room where Tri talks about a torch behind some metal fencing.
Use a fire-creating object of choice (a brazier or an ignizol) to light the brazier behind the fence. You’ll need to use the new-ish ability to place objects far away by holding Y to do so. Take out the shadowy bats in the room and light the two braziers on the upper platforms using the same strategy you used before.
For the last brazier behind the wall, you’ll need to place a fire source on the platform and then use Tri to carry it over, like so:

Image: Nintendo via Polygon
The next room has a gustmaster in it, which blows air in all directions every few seconds. You can defeat it by hitting it between air blasts, though it’s easier to just sicc a bunch of crows on it. You’ll get a Gustmaster Echo for your troubles. After you kill and collect your first one, you use Tri to just grab and drop them off their platforms, though the third and final gustmaster can be used with a flying echo to reach the next point. If you’ve already dropped it off the platform, then you can use water blocks to climb up instead.
Hyrule Castle dungeon map location
Now that you have the Gustmaster Echo, you can summon these on the grey-blue tiles that show up in the following part to make quick work of each enemy or puzzle. You can also just kill the enemies the normal way, it’s up to you.
At the top, there’s some ignizol, so take them out using whatever method and then head into the right room. Place a gustmaster on the blue square to mass-clear out the sand in this room (or summon a tornando). The sand will reveal a half-buried chest in the top right corner. Pluck it out of the sand with Tri and open it up to get the dungeon map.
Head back out to where you fought the ignizol and go north, leading to some shadowy zol. Use a gustmaster or kill ‘em the normal way, and then build a bridge up to the next platform. (We used beds because we love using beds.)

Image: Nintendo via Polygon
You’re now in the room with the boss door, though you don’t have the boss key yet. Interact with the warp waypoint and head into the left door. Take out the shadow enemies (or ignore them) and head down the ladder.
The next part of the game is an underwater maze in the darkness, somewhat similar to what you dealt with in the Jabul Ruins. Use a Tangler Lv. 2 Echo to light up the path, making sure to use the bubbles to replenish your air supply. There’ll also be shadowy webbing blocking off paths, which you can get rid of using your Swordfighter mode.
In all seriousness, this isn’t much of a maze because you have access to a map that pretty much will tell you where to go. If you don’t want to deal with opening it to double check your location constantly, here it is:

Image: Nintendo via Polygon
The chest in the middle of the room has a red rupee inside, and the chest in the bottom left has a silver rupee (worth 100 rupees) inside.
Once you swim up the left side, you’ll get another stealth segment, this time less cheese-able with flying tiles. Boo. To avoid the guards, stick to the top half of the map, just making sure to wait out the guards that circle the two top pillars.

Image: Nintendo via Polygon
Once you make it across, activate the white switch (drop a heavy echo on it or press it yourself after making a bridge) to make a chest with a small key appear in the center of the room. Warp back to the room with the boss door and now head right.
Summon a bombfish to blow up this hole in the wall and head inside to find a chest with a purple rupee (worth 50 rupees) and a bunch of pots:

Image: Nintendo via Polygon
Head south of this sandy room to use the small key on the southern door. Progress forward, waiting out the gustmaster and head down the ladder. Use a flying tile here while the second gustmaster isn’t gusting to cross over it.

Image: Nintendo via Polygon
Climb up the wall and the ladder on the right and press on until you’re in a room with three knights. Take them out (again, the darknut you got earlier should help), notably claiming a Ball-and-Chain Trooper Echo. Once you beat them, both doors will open, but head north first for a plethora of loot.
The left chest will have the frog ring, arguably the best accessory in the game, as it doubles the height you can jump. Huge. The right chest has a golden egg in it, and of course the boss chest has the boss key in it.
Teleport back to the room with the boss door and get ready for a fight that can be rough if you’re not prepared. We recommend stacking up on smoothies to replenish Swordfighter energy and ones that heal you before you head in.
How to beat Ganon, the Hyrule Castle boss

Image: Nintendo via Polygon
This fight is extremely similar to the first Ganon fight you did as Link in the opening bit of the game, with some ramped up difficulty.
During the phase one, Ganon will only do a few attacks:
- Ganon charges up and then lunges straight forward towards Zelda. Bait out the direction that he’ll lunge and then move out of the way. After he finishes his lunge, he’ll stand there for a bit, allowing opportunity to get some free licks in.
- Ganon stands and rotates his axe in front of him in a circle. This is a great time to use an echo to attack him, as he’ll face Zelda, so echoes can attack him from his open sides.
Phase two gets a bit trickier, as now he adds a few attacks to his repertoire:
- Ganon throws his axe in a straight line towards Zelda. He’ll immediately vanish after throwing it and reappear in a different place. His axe will slowly go back him to his new location. Hit him while he’s waiting for his axe to return.
- Ganon fires off several fire keese enemies at Zelda or an echo target. If the keese hit the wall, they’ll drop Swordfighter energy. If you can get behind him while he’s firing the keese, you can attack him pretty freely.
Avoiding his thrown weapon is harder than avoiding the bats and he doesn’t seem to teleport to a set location. We recommend walking straight away from Ganon while he winds up, and once he throws it, start moving in a circle around the arena. Hopefully Ganon will reappear in your path and you get some attacks in. If not, at least your dodged the axe.

Image: Nintendo via Polygon
After you hit him enough times, he’ll enter his phase three, where he only adds one more attack to his arsenal:
- Ganon fires a large fire orb at Zelda, which she can repel back in Swordfighter form. Continue volleying it back to Ganon to stun him, allowing you to get a ton of attacks in.
Getting the cadence for hitting the fireball back can be tough, as it does get faster as you volley it for longer, but keep practicing and drinking smoothies if you need to recover. He will also mix in his fire keese attack, so you can stay topped up on Swordfighter energy.
After letting out another roar, Ganon will enter his phase four (his final phase), which is just him using a combination of all the attacks above. Focus on dodging, collecting Swordfighter energy from the keese, and volleying those fireballs back, and he’ll be down in no time.
You should also be using enemy echoes to help aid you in battle, whether it’s the darknut you got at the beginning of the dungeon, an army of crows, or the ball-and-chain trooper you got shortly before the fight. While they will die in one hit to any of Ganon’s attacks, there’s no penalty for continuously spamming them, and they help distract Ganon at times, allowing you to get some free hits in.
After he’s down, Tri’s buddies will appear, they’ll power up, and you’ll get a Heart Container — the usual post-dungeon stuff. Leave the dungeon and a cutscene will play out and Zelda will finally get to rest in her own bed. Before you go back to the throne room, make sure to grab the Zelda’s Bed Echo, as it restores the most health in the game.
Once you chat up the king and his advisors, you’ll be tasked with closing three more huge rifts: one eating up the Eldin Volcano, one in the Hebra Mountains, and one in the Faron Wetlands.


